Thursday, 8 May 2014

Galley refit

The boat was as original, but in fair condition.....the trouble was I wanted a new boat but couldn't afford one! So out with the old and in with the new style!


It was all very tired and water stained, hot and cold pumped water to come!


I wanted LED lighting throughout, so getting rid of the old fashioned striplight would leave a hole in the cupboard surround, so that had to come out. The brief was also a cooler for the cool-box (you can't call it a fridge, but the cooler works well, more of that later)

The oven although used was in vgc, and I am determined to have my Christmas Turkey in there!!


While I was in there the formica work-tops were tired, and needed a lift, so some "granite" formica was fitted on all the horizontal surfaces. The wires are for the cooler controller and the central heating (hadn't I mentioned that yet?)


 The same technique as the electrical panel was used to make new surrounds. I didn't like the original plate "rack" so decided a cupboard would do well there also.


Making and fitting a new vinyl cover for the rear cabin was a bind, I take my hats off to the original builders for the job they did! (If you remember this panel had a large piece of wood on it with the harness clip bolted through it.)


Looking good, just the replacement cooler cover to do, and lighting and fridge and replacement gas hoses/pipes etc etc......


                                                                           Tad Dah!! 


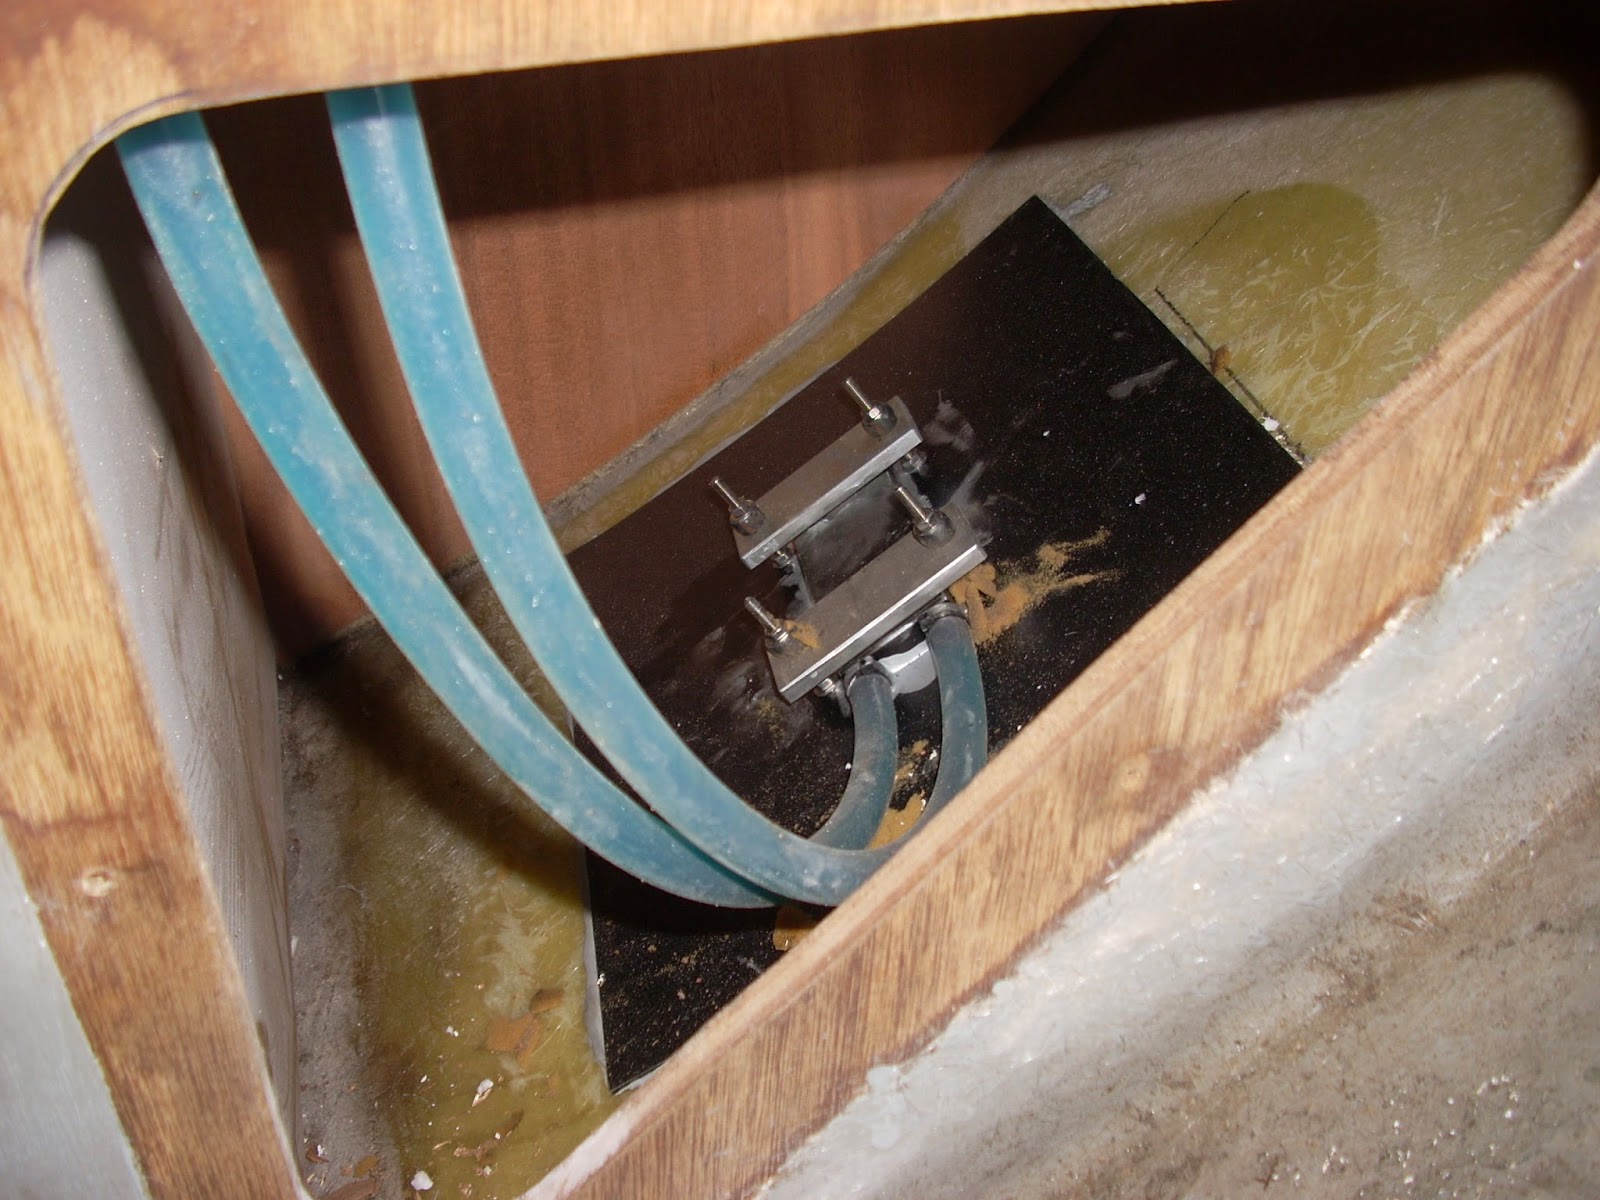
Oh yes, the cooler. I used a couple of Peltier cooler blocks clamped to the aluminium plate in the cooler box with a computer mini-fan to move the cooled air about. On the other side is a computer liquid heat sink with antifreeze mix circulating the heated coolant to another heat sink bonded to the inside of the hull with an aluminised resin to conduct the heat.

This is a hatch I cut in the bulkhead behind the coolbox. You can see the heatsink and the pump (again a computer unit, very low current consumption) The two Peltier blocks are set up so you can have one or two running controlled by an electronic thermostat, they are very current hungry, about 4 amps each so need to be used with battery state in mind.


Dream boat.......well it will be once it's done!

The Westerly Griffon has a very good reputation for being a comfortable cruising boat as well as having good handling and performance for a bilge keeler. Based upon my research and recommendations we looked at similar types of boats but found the Griffon to be all we wanted. I am 6ft and could stand upright with my hair just touching the ceiling (which was hanging down as do most old Griffon head-linings!) As a novice sailor having a bilge keel is welcome for those times when you don't quite make the tide! (click on a photo to see full size)

We found "Blue Oyster" locally at Morgan Marine Brightlingsea up for £9,995. She was well equipped with Depth, Wind and Speed logs, and a very nice Raymarine Chartplotter with Radar. The interior and indeed the whole boat was ok but very tired and in need of refurbishment, the nicest thing was that it was honest and had not been "tidied up" . The engine started ok and smoked a little (I was later to find out that it is a characteristic of the Volvo Md7) but if I were to enjoy taking this boat off-shore I would need to know in my own mind that all was well inside so it would be rebuild or replacement.
Some negotiation and a quick sale meant it was time to get her home. Driving to Brightlingsea from Colchester every time to work on it would be expensive on time and fuel, plus the cost of keeping it in Morgans yard made a trailer a "no brainer". I am handy with a Mig Welder, and about £1ks worth of steel and second hand axles from a Transit plus tow hitch had the trailer built.


So with a bundle of help from my friend Ian we towed the boat home and planted it in the front garden! The original idea was to bring it around the back of our house across the farmers fields, but after giving us the thumbs up before we bought it changed their minds! However, it was great to look out the lounge window and dream of sailing it!!


.......and from the feedback we had the locals enjoyed Christmas time..........

Typical of most Griffons the headlining had come unstuck and the other headlinings/sidelinings had also failed. Getting the old adhesive off was a real chore, I found the solvents to be nasty to use for both the smell and expense, so reverted to a good old wire brush. I machine I bought called an MBX was a life-saver. Its like an angle grinder but with a hooked wire wheel, this made short work of removing the old impact adhesive.
Very original interior showing the rooflining hanging down


Wardrobe sidlining.


Smelly!


Spot the different window, scratches and the corrosion on the window bezels.
Original cushions, worn well. So much potential.......!


It's called the "cat flap" where you put your feet through!


Nice cooker......Sunday roast in there one day!


Working ok, but what's lurking inside?


Navigation kit and rewire.


So to work on the rewiring and updating of the Nav' area. The main lead to the Raymarine Chart plotter had been partially cut through when the depth sounder display was installed, so a bit of surgery to repair that was in order. Having the radio on a stalk in the corner didn't fit with my "vision" of what was to be. (remember, you can click on any photo to see a larger/clearer version) so I stripped out everything and started again.


 The framework is to support the fascia woodwork and create the spaces for Comm's & entertainment radios. The wood panel is the backing for the charge controller. 


Paint and the conduit meant I could get on and start the wiring....should have used larger conduit!


Here is the final fit of the woodwork. The HRDi charge controller is partially "sunk" so that the wiring is not on display....quite why someone would design it that way I don't know, but then my whole experience with Marlec was not one I enjoyed. Of course don't forget the charger/holder for the iphone! (it serves a very useful function, not just for comm's but a very low power consumption anchor watch)


Here is the wood panel veneered with Sapelle. It is a sod to apply, as I didn't like the stuff with the adhesive pre-applied, so used raw veneer, glued on with Thixofix impact adhesive, then two coats of varnish.


 I was pleased with the final outcome, but with the angles of the cabin and veneer I am never convinced any line is at right-angles to each other!


Having the chartplotter available to see from the cockpit is mandatory, later I made a catch to stop it swinging back indoors in heavy seas.